
When I first saw the Dryad Drey, like a lot of you, I was super confused. Fast forward a couple months, and even though I had never laid hands on a Drey, I knew I needed one to pair with my ring of steps. So, I ordered myself a couple different weights of Ripstop Nylon, let them sit age on my shelf for a month (and a half) like proper DIY guy, then got to work.
Materials:
Machines:
** The CB3200 is a leather machine and overkill for most things, but I inherited it, and fitted it up with a synchronized binder. It makes life really nice.
Construction of the Drey was fairly straightforward. I first compared the 1.9 oz and 1.55 oz Ripstop Nylon I had ordered, and decided that due to sound and packability, the 1.55 oz would be the hero of the day. The 2 yards of 1.9 oz was squared off, and the edges were bound with 3/4" milspec grosgrain to make a sweet ground cloth to use when quartering deer.


After making the ground cloth, I got back on track. I set up my machines to sew with some Tex 138 bonded polyster thread, and make up a belt and leg straps (still need to make some slide on pads). Next, I squared off and cut a couple (2-4"?) off either side of my 1.55 oz Ripstop, in addition to a little off the bottom. I'd have to measure to tell you how much, in the end, I used the measurements of my body when in a sitting position to roughly determine proper dimensions.
Then, I hemmed all the edges, and attached the first ~1/2 of the grosgrain on all four corners. Then I folded the sides of the grosgrain over with the Ripstop to create a roughly 2.5" overlap and channel. Next the continuous length Amsteel loops are run through and girth hitched to the channels (big thanks to @Dwhit for sending me some pictures). I opted to used 1" grosgrain to create loops for attaching the long back support prusiks, instead of sewing in the cord. I folded each side of the grosgrain in toward the center to create a 1/2" wide ribbon with rounded edges, then sewed them down to the 1.5" grosgrain with heavy stitching so they don't go anywhere. These loops will allow me to easily change my cord length or material later on (just used 550 cord for now).
I won't bore you with the Amsteel procedures which have been covered really well on YouTube and elsewhere on this forum.
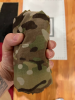
Next, I started a quick pouch, smaller than the original Drey's. At this point I realized I had made the first of two stupid mistakes--I attached my bridge and prusiks to the hammock without finding its center for attaching a pouch... So, I disassembled it, found center, and continued. I carefully laid out the hammock on the pouch panel, double-checked that I had oriented everything correctly, sewed them together, then panicked! I had sewn the inside of the panel to the wrong side of the hammock!..... After about 15 seconds of disgust and horror, I realized I had in fact done everything properly.
Moving on, I twisted myself into mental knots trying to figure out which way I needed to orient the zipper on my pouch so that the zipper came to my righthand side when everything was closed up.... Sewing inside out is taxing on my simple mind. In the end, I chose properly, sewed it all up, and flipped it inside out. Success, I'll attach it to my belt! Enter error number 2--while I made more than enough room to clear the 1.75" webbing on my belt loops, I made them about 1/8" too short to clear the smaller male buckle. I hung my head in shame, and ripped the seams of the folded tail of the belt, attached the pouch, and rushed outside to test out my new system.
Conclusion: This thing is super comfortable, and I cannot wait to take it hunting.


Materials:
- 2yd 1.55oz Multicam Ripstop Nylon (Ripstop By The Roll)
- Multicam Cordura (eBay)
- Australpin and Raptor Buckles (Amazon?)
- 7/64" Amsteel* (RSBTR)
- 1.5" Grosgrain Ribbon (RSBTR)
- 2" Nylon Webbing (Jontay?)
- 1.75" & 1" Heavy Duty Nylon Webbing (Country Brook Design)
- 3/16" & 1/4" Amsteel (Eastern Woods Outdoors)
- Zippers, grosgrain, etc (Rocky Woods, WTFIdea)
Machines:
- Juki 1541S - General sewing
- Juki 1900 clone - Bartacks
- Consew 332R - Ripstop hemming
- Cowboy CB3200** - Binding
** The CB3200 is a leather machine and overkill for most things, but I inherited it, and fitted it up with a synchronized binder. It makes life really nice.
Construction of the Drey was fairly straightforward. I first compared the 1.9 oz and 1.55 oz Ripstop Nylon I had ordered, and decided that due to sound and packability, the 1.55 oz would be the hero of the day. The 2 yards of 1.9 oz was squared off, and the edges were bound with 3/4" milspec grosgrain to make a sweet ground cloth to use when quartering deer.
After making the ground cloth, I got back on track. I set up my machines to sew with some Tex 138 bonded polyster thread, and make up a belt and leg straps (still need to make some slide on pads). Next, I squared off and cut a couple (2-4"?) off either side of my 1.55 oz Ripstop, in addition to a little off the bottom. I'd have to measure to tell you how much, in the end, I used the measurements of my body when in a sitting position to roughly determine proper dimensions.
Then, I hemmed all the edges, and attached the first ~1/2 of the grosgrain on all four corners. Then I folded the sides of the grosgrain over with the Ripstop to create a roughly 2.5" overlap and channel. Next the continuous length Amsteel loops are run through and girth hitched to the channels (big thanks to @Dwhit for sending me some pictures). I opted to used 1" grosgrain to create loops for attaching the long back support prusiks, instead of sewing in the cord. I folded each side of the grosgrain in toward the center to create a 1/2" wide ribbon with rounded edges, then sewed them down to the 1.5" grosgrain with heavy stitching so they don't go anywhere. These loops will allow me to easily change my cord length or material later on (just used 550 cord for now).
I won't bore you with the Amsteel procedures which have been covered really well on YouTube and elsewhere on this forum.
Next, I started a quick pouch, smaller than the original Drey's. At this point I realized I had made the first of two stupid mistakes--I attached my bridge and prusiks to the hammock without finding its center for attaching a pouch... So, I disassembled it, found center, and continued. I carefully laid out the hammock on the pouch panel, double-checked that I had oriented everything correctly, sewed them together, then panicked! I had sewn the inside of the panel to the wrong side of the hammock!..... After about 15 seconds of disgust and horror, I realized I had in fact done everything properly.
Moving on, I twisted myself into mental knots trying to figure out which way I needed to orient the zipper on my pouch so that the zipper came to my righthand side when everything was closed up.... Sewing inside out is taxing on my simple mind. In the end, I chose properly, sewed it all up, and flipped it inside out. Success, I'll attach it to my belt! Enter error number 2--while I made more than enough room to clear the 1.75" webbing on my belt loops, I made them about 1/8" too short to clear the smaller male buckle. I hung my head in shame, and ripped the seams of the folded tail of the belt, attached the pouch, and rushed outside to test out my new system.
Conclusion: This thing is super comfortable, and I cannot wait to take it hunting.
Attachments
Last edited:


