- Joined
- Jan 3, 2022
- Messages
- 4,241
I gotta get one of those. That should have been the first thing I bought. I was sewing good and then the bobbin ran out of thread and so I rewound the bobbin and rethreaded the machine and started getting birds' nests again on the back side of the material. After a while I was getting cross eyed again so I decide to leave it be and come back to it maybe tomorrow.Stitches are looking great!
Also, dont be a fraid to get out the seam ripper/thread remover and remove the stiches. It happens to the best of us.
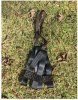
I found enough spare seatbelt material I salvaged from some spare safety harnesses to make up a test saddle. Hopefully I can get enough practice making it to be proficient by the time I decide to actually start on one I plan to use. If the first one turns out OK I can use it as a saddle for archery practice at ground level. That will also be a good test to see how the stitching holds up with use over the summer getting a good bit of use.