
Since @thedutchtouch suggested I do so, figured I would go ahead and share last weekend's project--a Kifaru Megatarp inspired build based on plans found here: https://www.rokslide.com/forums/threads/diy-megatarp.34165/
My primary tent is a Kifaru Sawtooth, but since I'm usually hunting and camping alone, wanted something a little smaller and lighter. At first I was going to make a 10'x10' tarp and call it good, but wanted a bit more space for my gear. Given that this is for solo use, I don't have any true need for a zippered opening at the rear of the tent, and omitted that feature. Later on, I may opt to add a zippered door to the front.
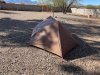
My first pitch is pictured below, not the best, but it works. I took it into the mountains and slept in it Sunday and Monday night. It worked well, even in strong winds and temperatures dipping down to ~23F.
I intended to use 1.1 oz silnylon for this build, but since I also had 1.6 oz HyperD PU4000 on hand, decided to use it instead. The HyperD fabric has a minor weight penalty, but feels tougher and is much easier to work with. I'll save the silnylon for that 10'x10' tarp that I'll eventually find myself sewing.
Materials:
1.6 oz HyperD PU4000
 ripstopbytheroll.com
1" Orange grosgrain
1.5 mm Poly/UHMWPE Reflective Cord
 ripstopbytheroll.com
MSR Groundhog and Mini-Groundhog Stakes

 www.rei.com
 www.rei.com
Construction:


.jpg")

My primary tent is a Kifaru Sawtooth, but since I'm usually hunting and camping alone, wanted something a little smaller and lighter. At first I was going to make a 10'x10' tarp and call it good, but wanted a bit more space for my gear. Given that this is for solo use, I don't have any true need for a zippered opening at the rear of the tent, and omitted that feature. Later on, I may opt to add a zippered door to the front.
My first pitch is pictured below, not the best, but it works. I took it into the mountains and slept in it Sunday and Monday night. It worked well, even in strong winds and temperatures dipping down to ~23F.
I intended to use 1.1 oz silnylon for this build, but since I also had 1.6 oz HyperD PU4000 on hand, decided to use it instead. The HyperD fabric has a minor weight penalty, but feels tougher and is much easier to work with. I'll save the silnylon for that 10'x10' tarp that I'll eventually find myself sewing.
Materials:
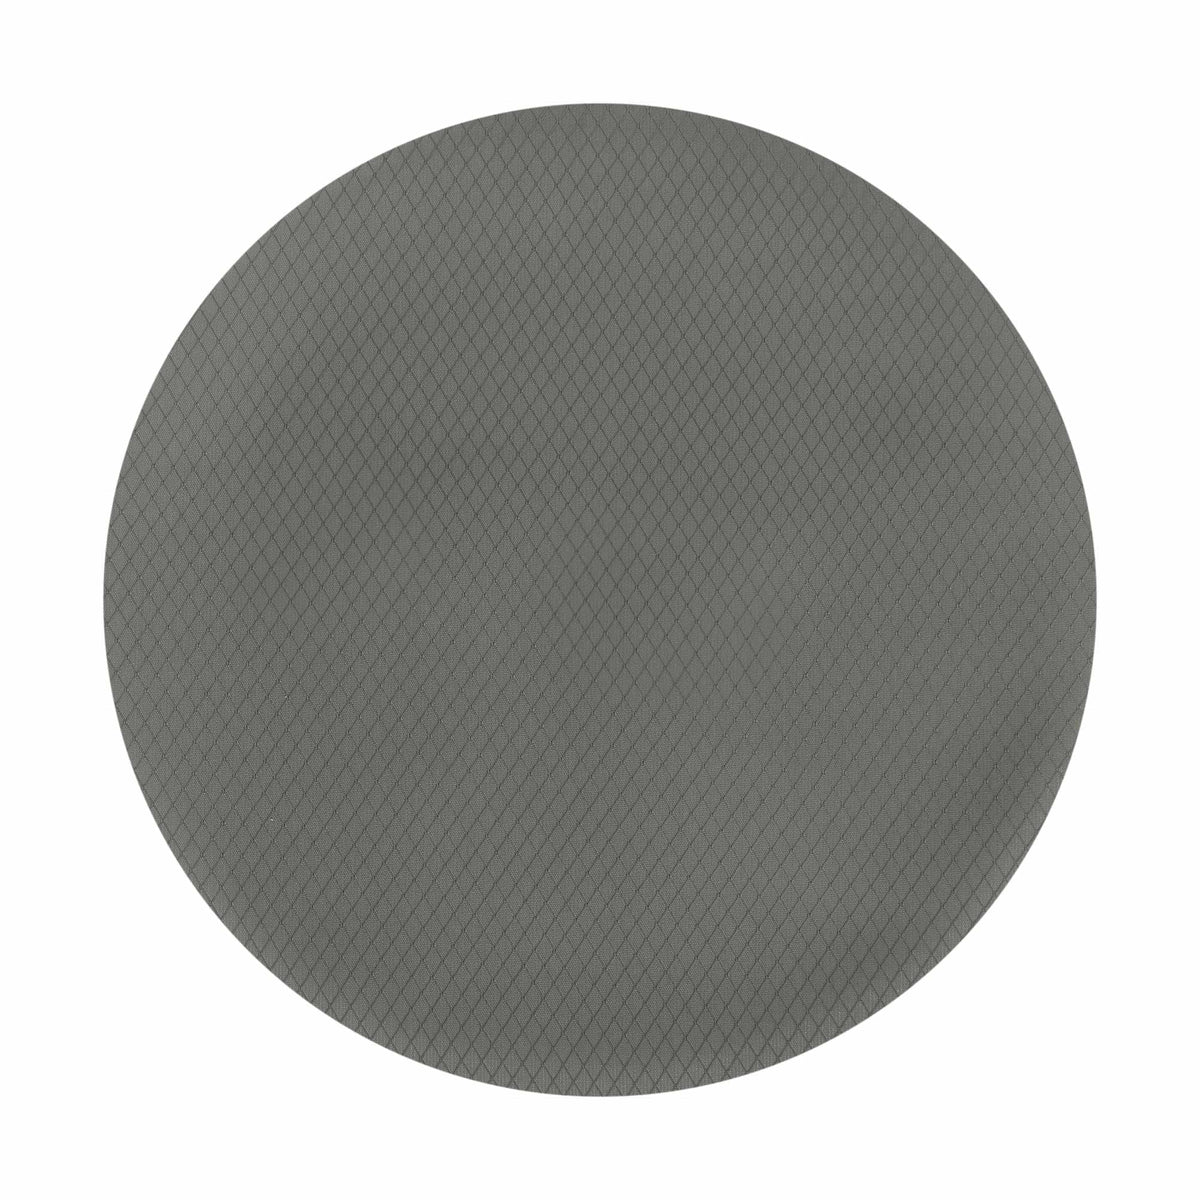
1.6 oz HyperD PU4000
1.6 oz HyperD™ PU4000
Our 1.6 oz. HyperD PU 4000 is the waterproof version of our custom developed HyperD lightweight diamond grid nylon. Durable, low stretch, water/wind proof.
1" Orange grosgrain
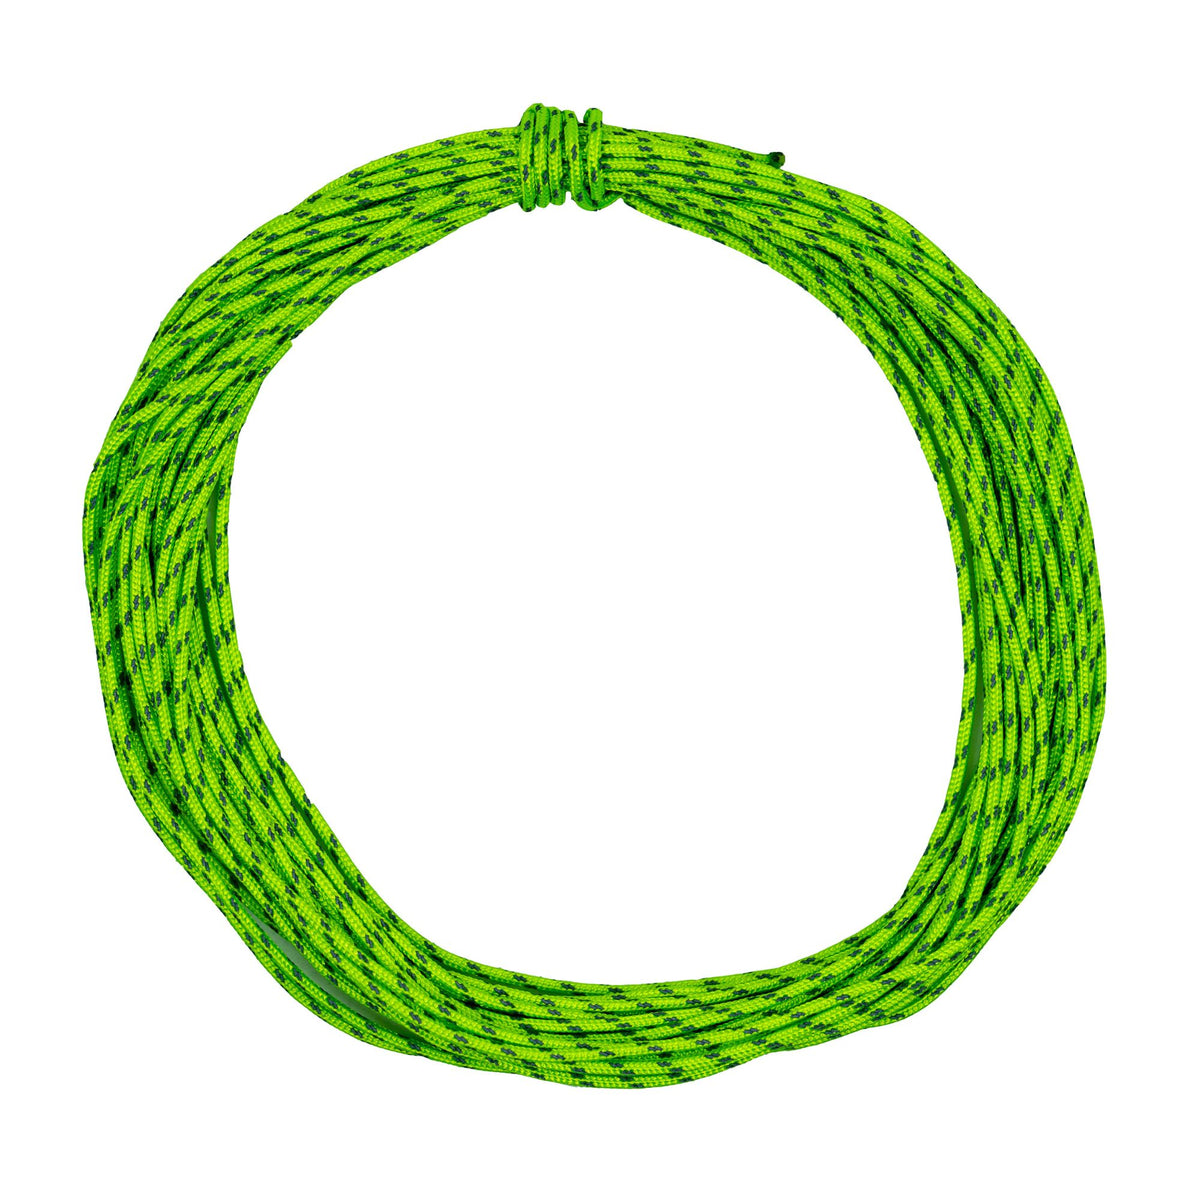
1.5 mm Poly/UHMWPE Reflective Cord
1.5 mm Poly/UHMWPE Reflective Cord
1.5 mm polyester cordage with a UHMWPE core for added break strength. This cord also contains a braided reflective tracer for maximum low-light visibility. Commonly used as a lightweight draw cord for bags, gear sacks, tie-outs, etc. *Note: sold in pre-cut 25 foot sections. Enter a qty of "1"...
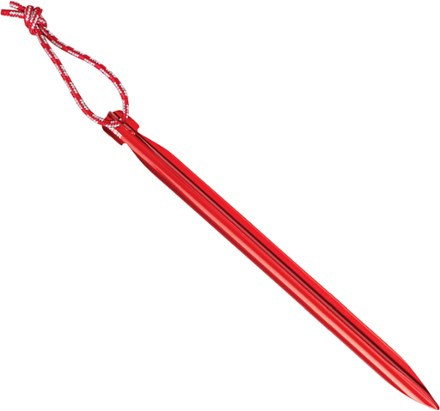
MSR Groundhog and Mini-Groundhog Stakes
MSR Mini Ground Hog Stake | REI Co-op
The MSR Mini Ground Hog Stake penetrates and holds with its Y-beam design.
MSR Ground Hog Stake | REI Co-op
This sturdy aluminum tent stake is nearly indestructible.
Construction:
- Cut out the two halves of fabric (see Rokslide link for pattern)
- Glue down reinforcement pieces along the edges (all reinforcements used contact cement, then were sewn)
- Hem the outside edges
- Use flat felled seam folder to join the halves with my double needle machine (this step sucks with such a light fabric)
- You could also do this, from RSBTR DIY instructions

- You could also do this, from RSBTR DIY instructions
- Glue and sew on reinforcement patches for pull outs
- Glue and sew on reinforcement for trekking pole pitch
- Bartack down grosgrain for pull outs, stake points, and points on ridgeline to pitch on rocks/trees without trekking poles
- Seam seal (haven't done this yet)
- Eventually make a new stuff sack because the first one is a bit tight.
- Create a single-man bug mesh nest + floor for when the weather heats up and scorpions are out and about

")