• The SH Membership has gone live. Only SH Members have access to post in the classifieds. All members can view the classifieds. Starting in 2020 only SH Members will be admitted to the annual hunting contest. Current members will need to follow these steps to upgrade: 1. Click on your username 2. Click on Account upgrades 3. Choose SH Member and purchase.
  • We've been working hard the past few weeks to come up with some big changes to our vendor policies to meet the changing needs of our community. Please see the new vendor rules here: Vendor Access Area Rules

Hobby room/Archery shop build.

Arrowsquirrel

Well-Known Member
SH Member
Joined
Feb 5, 2019
Messages
1,043
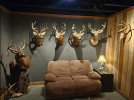
I've spent the last year or so working on a project at my place. I really enjoy construction so it's been a hobby all on its own. If like to share it with you all. Hopefully some of you can pull some insperation from it.

The way our basement lays out I had a nice sized corner that we couldn't turn into a bedroom because of the lack of a egress window. I had an idea for a hobby/archery shop and more than anything a place to go with all my accumulate hunting stuff.

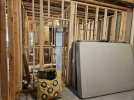
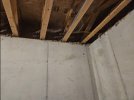
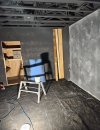
It started out with bare concrete and insulation falling out of the floor trusses.
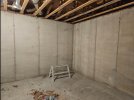
Screenshot_20240206_111904_Gallery.jpg
Screenshot_20240206_111918_Gallery.jpg
Had a couple helpers.
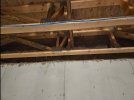
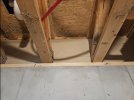
Screenshot_20240206_111929_Gallery.jpgScreenshot_20240206_112014_Gallery.jpgScreenshot_20240206_112023_Gallery.jpg

I was wanting to paint the ceiling so my first project was covering all the insulation with some sheeting. Took me hours to cut around all the boards and pipes.
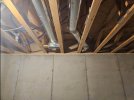
Screenshot_20240206_112054_Gallery.jpg
Screenshot_20240206_112054_Gallery.jpgScreenshot_20240206_112107_Gallery.jpg

I was able to salvage a bunch of packing lumber from the local landfill for the walls so I ended up sheeting the walls before I painted the ceiling and walls black.
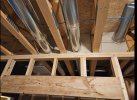
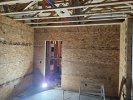
Screenshot_20240206_112128_Gallery.jpgScreenshot_20240206_112240_Gallery.jpgScreenshot_20240206_112530_Gallery.jpg
 
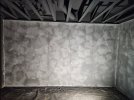
The next step was painting the concrete to save me some framing materials and packing lumber. I ended up finding like wash paint and was impressed with the result. It ended up with kind of a textured look.
Screenshot_20240206_112553_Gallery.jpg

Packing lumber prep and layoutScreenshot_20240206_112640_Gallery.jpgScreenshot_20240206_112653_Gallery.jpg

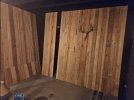
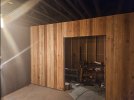
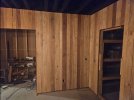
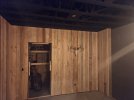
Packing lumber installed
Screenshot_20240206_112713_Gallery.jpgScreenshot_20240206_112722_Gallery.jpgScreenshot_20240206_112731_Gallery.jpg


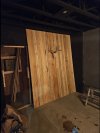
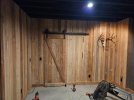
Barn door built and installedScreenshot_20240206_112828_Gallery.jpg


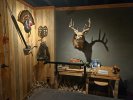
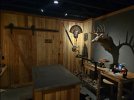
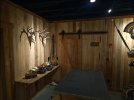
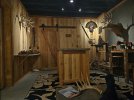
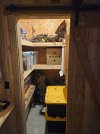
There was a lot of steps I didn't get pics of. The wiring was a learning curve for sure. Was able to install all the outlets and lights with a electricians help and recommendation. Ended up building a concrete top work bench with toolbox hidden under. Also built shelving and storage closet with a target and paper tuning stand.
 
The next step was painting the concrete to save me some framing materials and packing lumber. I ended up finding like wash paint and was impressed with the result. It ended up with kind of a textured look.
View attachment 99552

Packing lumber prep and layoutView attachment 99553View attachment 99554

Packing lumber installed
View attachment 99555View attachment 99556View attachment 99557


Barn door built and installedView attachment 99558


There was a lot of steps I didn't get pics of. The wiring was a learning curve for sure. Was able to install all the outlets and lights with a electricians help and recommendation. Ended up building a concrete top work bench with toolbox hidden under. Also built shelving and storage closet with a target and paper tuning stand.

Willing to share more about the product and process you used on the concrete?
 
Willing to share more about the product and process you used on the concrete?
Sure. I used a lime wash paint. Ended up only needing to give it 2 coats. Took a lot of back and forth wiping and smearing on the first coat to fill in all the pinholes and divets. Second coat was a breeze. The process to get the random texture is fairly simple. You just paint in small patches as you move. Working your brush completely dry on each section.


VASARI Lime Plaster & Paint | LIME PAINT | Made from Natural Lime and Powdered Marble | color: Charcoal #26 | size: 1 Gallon https://a.co/d/9IpLxLT


ROLLINGDOG 5.5" Deck Stain Brush - Wood Handle Large Deck Brush Applicator for Wall, Wood, Fence, Floor Painting https://a.co/d/50G6Hpy
 
Looks sick! You should think about adding some lighting inside those shelves too! So you can see all the gear under and in those bins without having to pull them out
 
I got lost when I saw the giant shed on the floor!!


From a place to work perspective, do you have more lighting? Looks absolutely great from a man cave display perspective but not for working

Love that wood look as well. Reminds me of the pallet walls that I’ve never been able to make work.
 
I got lost when I saw the giant shed on the floor!!


From a place to work perspective, do you have more lighting? Looks absolutely great from a man cave display perspective but not for working

Love that wood look as well. Reminds me of the pallet walls that I’ve never been able to make work.
Yeah I have can lights in the ceiling on a dimmer. Most of those pics they are off or all the way dim. The track lighting are on dimmers all the way dim also. I can make it brighter not sure yet if it will be enough though.

Yeah the wood is basically pallet wood in a different dimension. I got it free from the landfill. Some local business must have been shipping a bunch of long components of some sort. It's not kiln dried so it's doing a little shrinking already.
 
So... If ya open the door, how far can you shoot inside ;) looks very nice, I am jealous and daydream constantly about digging out my 100 year old crawlspace/cellar into a proper basement/man cave. Maybe some day...
 
Back
Top