• The SH Membership has gone live. Only SH Members have access to post in the classifieds. All members can view the classifieds. Starting in 2020 only SH Members will be admitted to the annual hunting contest. Current members will need to follow these steps to upgrade: 1. Click on your username 2. Click on Account upgrades 3. Choose SH Member and purchase.
  • We've been working hard the past few weeks to come up with some big changes to our vendor policies to meet the changing needs of our community. Please see the new vendor rules here: Vendor Access Area Rules

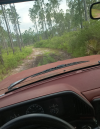
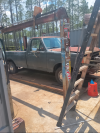
Truck build

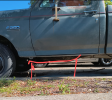
Main goal is door protection and a place I can use the farm jack on the side of the truck..... and a step I guess

Next time I make it to where the crawler truck is I'll measure and see how difficult it will be to cut out and reuse the rectangle tube.

The round pipe best for sliding off stuff and deformation/denting but it's not that important as long as it's fairly strong structure and the material thickness withstand some hits. It's gonna bend/dent someday....I just want the doors to function as long as possible
Can you brace the areas in between the 'standard' two attachment points on each end? For instance, have four attachment points to give them more beef.

Do folks still call them nerf bars?
 
Can you brace the areas in between the 'standard' two attachment points on each end? For instance, have four attachment points to give them more beef.

Do folks still call them nerf bars?
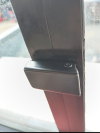
I've always thought of nerf bars as the side steps /fake sliders, where it's sometimes mounted to the body and more for looks or stepping up into the truck than protection, and rock sliders where they are frame mounted/actually supposed to be slid on things to protect the doors.
 
Is that other one a 74?
Blue 76 ....brown 79

Can you brace the areas in between the 'standard' two attachment points on each end? For instance, have four attachment points to give them more beef.

Do folks still call them nerf bars?
Dutchtouch explained it well.

The frame on this truck actually has very little hanging below the bottom of the cab. So I don't really have much room to attach straight off the frame. I'll probably only end up with 2 points of attachment. Screenshot_20240501-100302~2.png
 
I looked for well over a year to find a topper for the Nissan that didn't have an outrageous pricetag. Seemed like every used topper that was in my price range was for a full size 8ft bed. I ended up driving 1.5 South to get the 1 i finally found...... Now that I'm looking for an 8ft topper every single used 1 that I'm finding is for small trucks or 6ft full size beds. It's almost comical.
 
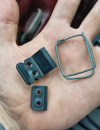
This 1s for all of us who have sliding back windows. U all know how much of POS the dorman replacements are. I've had a strategically bent paperclip keeping my window "locked" for a while now.Screenshot_20240513-153351~2.png

Everything we touch we must improve..... Copy and paste for a metal replacement.


C.R. LAURENCE DVL2 CRL Replacement Metal Backslider Latch


I didn't have to modify the latch at all but did have to use the included screws. I would have rather used OEM but I would have had to make some tiny little spacers....using the other screws that came with the latch wallered out the holes cutting new threads....but it's on there and strong. Improvement over stockScreenshot_20240513-153359~2.png
 
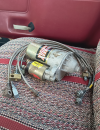
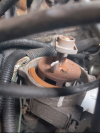
I still need to mount the lightbar and run wiring front and back, decide where to mount the toggles but that not very high priority. The starter is high priority....the 1 that's on there isn't gonna be alive much longer based on the noises it's started making. I started poking around in the garage and found a high torque from a 302/5.0 auto......luckily for me there's only 2 starters for our Ford's. Four cylinder to big block, gas or diesel, 1964-1997 there's only 2 part #s

I found these stainless.braided brake lines while I was looking for the starter. I can't remember what the original purpose is/was. I think they were on my 92 ranger? Not sure if they gonna just bolt right on but they will be going on there soon. The factory rubber lines are all rotted and need to be replaced sooner rather than later. Screenshot_20240514-124235~2.png
 
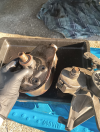
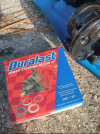
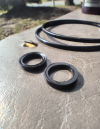
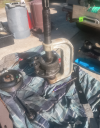
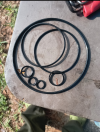
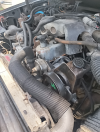
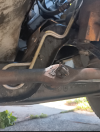
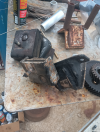
I've been busy and it's hard to get motivated when it so hot. The junkyard pw steering pump ended up having a leak. I've been feeding it fluid till I had the time and parts accumulated. I had to do a little research cause I've never had this style pump before. The o ring kit covers a huge range of years makes and models and best of all it's cheap. 1962-2002 or something like that...Ford Chevy Dodge all the same part #. Took about 3 hours and the next time would take an hour. Id rate it a 5 out of 10 on a difficulty scale. My hypothesis now is that it was leaking when I originally installed but it took a while for the fluid to make it down to the ground and start dripping. Now that it's resealed it noticably quieter than it was before. The ball joint /u joint clamp/tool was the hero of the day....made compressing the spring to remove the big old honky snap ring a piece of cakeScreenshot_20240630-124641~2.pngScreenshot_20240630-124655~2.pngScreenshot_20240630-124705~2.pngScreenshot_20240630-124714~2.png
 
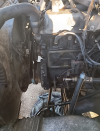
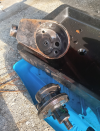
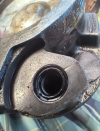
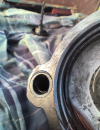
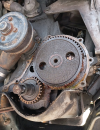
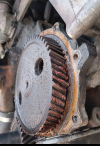
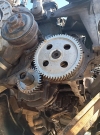
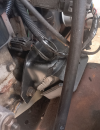
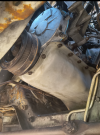
U guys wanna see what a 37 year old "fiber" gear looks like? I was heading to scout Thur at 5 in the morning the gear catastrophically failed and let me stranded. Ive almost got it all fixed. Hopefully back up and running again tomorrow late afternoon. This repair has been a butt kick. Gotta take half the truck apart and stop just shy of pulling the motor. Screenshot_20240705-223644~2.pngScreenshot_20240705-223628~2.pngScreenshot_20240705-223654~2.png
 
Hit a road block with this stupid oil pan gasket that isn't right......I don't see how this would ever seal so I had to stop early this afternoon and go find another gasket setScreenshot_20240705-224534~2.png
 
Ok so I’m ignorant to what you had to do to create space on the lower. Unbolt the motor, jack. & shim it up for enough clearance to get the pan out open the case????
 
Yeah....the oil pan was a butt kick. I had to drop it cause the broken bits of that cam gear fell down into the pan. U gonna need to disconnect battery, drain coolant and take off the radiator hoses, drain oil, disconnect transmission cooler lines, disconnect and remove starter, separate the torque converter and disconnect transmission and rear driveshaft and push it back as far as u can, unbolt motor mounts, jack up the engine far as possible (I had to remove the EGR to gain some extra clearance) unbolt pan, and even after all that u still gonna have to maneuver the pan out and in a specific way...the oil pick up hanging way down into the pan.
 
I was a little nervous and second guessing myself when I went to fire it for the first time....it wouldn't fire off and was backfiring while trying to start.....so I removed the distributor cap so start the process of finding TDC and the dang rotor button was broke. I now it wasn't broke prior and when I put the cap back on it wasn't broke.....first attempt to start it broke. My hypothesis is the chain I was using for lifting the motor swung down and hit the bottom cracking it but not breaking it. The attempt to start finishes it off...or at least that what I think happened. Run to the parts house,.install new rotor, and it fired first try.Screenshot_20240706-225341~2.png
 
Back
Top