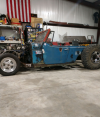
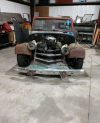
I had to bypass the solenoids and "hot wire" it to work but the first pull on the winch was winching me up onto the trailer when my friend showed up to rescue me. Winched out and it lowered the truck straight onto the lift. The winch brake I rebuilt was working correctly.
-
The SH Membership has gone live. Only SH Members have access to post in the classifieds. All members can view the classifieds. Starting in 2020 only SH Members will be admitted to the annual hunting contest. Current members will need to follow these steps to upgrade: 1. Click on your username 2. Click on Account upgrades 3. Choose SH Member and purchase.
-
We've been working hard the past few weeks to come up with some big changes to our vendor policies to meet the changing needs of our community. Please see the new vendor rules here: Vendor Access Area Rules
You are using an out of date browser. It may not display this or other websites correctly.
You should upgrade or use an alternative browser.
You should upgrade or use an alternative browser.
Truck build
- Thread starter Weldabeast
- Start date
Are you going to get time to hunt?I was a little nervous and second guessing myself when I went to fire it for the first time....it wouldn't fire off and was backfiring while trying to start.....so I removed the distributor cap so start the process of finding TDC and the dang rotor button was broke. I now it wasn't broke prior and when I put the cap back on it wasn't broke.....first attempt to start it broke. My hypothesis is the chain I was using for lifting the motor swung down and hit the bottom cracking it but not breaking it. The attempt to start finishes it off...or at least that what I think happened. Run to the parts house,.install new rotor, and it fired first try.View attachment 104315
I sure hope so....hahahahaAre you going to get time to hunt?
For anybody following along thinking of replacing the timing gears on ur 300 the way I come up with to remove the fiber gear was to drill and tap 2 5/16 18 holes into the fiber stuff 90 degrees of the holes in it and then use ur standard timing gear puller. I was nervous cause it was taking some real pressure.....couple cranks on the ratchet, spray with penetrating oil and give it some taps with a soft punch on the snout of the cam shaft, wait a little, couple cranks, repeat.....take ur time.....if that gear shatters and u don't have anything to pull against anymore and u go na be real sad. I guess u would have to cut the collars off with a grinder or dremel if the gear exploded and the collars were still pressed on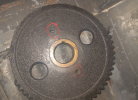

Well....couple days after buttoning everything back up and all is well. No leaks or noises (other than the definite metal on metal gear whine which I believe to be the new norm but I think it's supposed to sound like that) or anything out of the ordinary. I was thinking about doing some sort of crankcase flush but between the top end rebuild 3 or 4 years ago and the extra anal retentive cleaning job I just did on the bottom end I changed my mind and just gonna let it ride. She seems a little tired based off compression while turning the crank over during the timing job but the first thing I did was donuts out in the front field of the property where I worked on it.....she still got plenty of go. The lower gears in the axles are really gonna help it there so I'm not sweating it. It doesn't burn oil and basically a new motor now with all the best upgrades with the new 3g alternator and Saginaw steering pump. The steering is by far the best thing so far. It makes it a new truck. I know it might be kinda difficult and cost ya couple hundred bucks but I highly encourage all u obs owners to research it and find a van with the parts u need.
Next on the list is new rear brakes. I'm torn between replacing factory drum stuff or if I spend an extra 150 could swap to disk. Disk is required for an off roader imo but this is just a daily driver/hunting truck that may occasionally do stupid stuff so I'm kinda thinking just replace what I got.
I discussed the 4x4 swap in depth while my buddy and I worked together on the timing job. It's coming but it may have been pushed back a little. I will probably be a poser for a little bit with a front axle and not driveshaft. The plan is to install all front suspension, front axle, new steering, brakes working, rear axle at new height, fenders trimmed,.and tires installed on the first round. The second round would be install 4x4.transmisson and transfer case, build appropriate mounts/cross members and modify the rear driveshaft and possibly build the front. Last phase would be would on the rear differential and install new gear set and locking differential.......then there is a while new set on skills I gotta learn with plumbing an air system to get the needed psi to the front axle to engage the front locking differential......when we'll be cooking with fire. Both rear wheels will spin all the time with no slippage when power is delivered to the rear axle. The front axle is "open diff/1 wheel peel" until I engage the front locking diff and then all 4 wheels spinning 100% all the time. Lockers and the winch (still need to fix it to work on a controller) and I don't think I'll be getting stuck any time soon while out hunting. Wet depth is a concern. 37" tire are big but not that big. It's normally good practice to check water depth before entering anyway right?
What year again? ....is it almost 40 yet?
Go ahead and do a timing job for under 4hundo and get back to me.
Go ahead and do a timing job for under 4hundo and get back to me.
...........crickets
I'm driver a
- Joined
- Sep 27, 2018
- Messages
- 4,128
What year again? ....is it almost 40 yet?
Go ahead and do a timing job for under 4hundo and get back to me.
It’s 11, buts it’s a Toyota so it’ll run forever

Guess who's winch finally works with the controller?......this guy
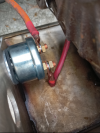
The original solenoids grounded themselves when u attach them to the mounting plate.....apparently the new solenoids don't externally ground like that so I ended up having to ground each solenoid individually and now works as it's supposed to.
I want to find the topper real bad before hunting season but I'm not gonna get my hopes up. Fixing the winch was high priority and getting that silly front light bar mounted needs to happen before Sep.
Now that I got the winch working correctly I really need to take the wiring back apart and wire in the emergency kill switch that I bought. The way it's run now (the way u supposed to if u following original instructions) the winch is always hot...so in some crazy situation it could technically get stuck on while winching in and that obviously very bad. The kill switch just give me piece of mind and lock out tag out for unauthorized use.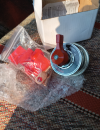

I also decided that I will end up making a small expanded metal step on the bumper on the short side to match the long side. It is so useful having a step right there and that small side step would also protect the kill switch if I mount it right here...I already got a hole in the plate that looks like it would work perfect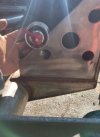

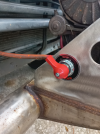
Hole was a little too big and the switch designed to pass thru something 3/8 thick so I made an aluminum washer/spacer and then cut out a thin piece of rubber. Rubber keeping the spacer from making metal to metal contact with the switch
I need some opinions from some peeps.....my bench seat is amazing on the passenger side but not so much on the driver. I found some essentially brand new aftermarket buckets for a real good deal....I'm torn....I like the bench but buckets sure would be nice and comfy. Id loose the cool cowboy seat cover
My vote is what you have……. But how much of a good deal?????I need some opinions from some peeps.....my bench seat is amazing on the passenger side but not so much on the driver. I found some essentially brand new aftermarket buckets for a real good deal....I'm torn....I like the bench but buckets sure would be nice and comfy. Id loose the cool cowboy seat cover


