-
The SH Membership has gone live. Only SH Members have access to post in the classifieds. All members can view the classifieds. Starting in 2020 only SH Members will be admitted to the annual hunting contest. Current members will need to follow these steps to upgrade: 1. Click on your username 2. Click on Account upgrades 3. Choose SH Member and purchase.
-
We've been working hard the past few weeks to come up with some big changes to our vendor policies to meet the changing needs of our community. Please see the new vendor rules here: Vendor Access Area Rules
You are using an out of date browser. It may not display this or other websites correctly.
You should upgrade or use an alternative browser.
You should upgrade or use an alternative browser.
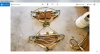
Family Saddles
- Thread starter always89y
- Start date
Very nice! Looks like your set for the Three Bears!!!!
ImThere
Well-Known Member
You completely rocked it! Good job!
Sent from my iPhone using Tapatalk
Sent from my iPhone using Tapatalk
WOW. Those look amazing
shwacker
Well-Known Member
- Joined
- Dec 10, 2018
- Messages
- 984
I remember your post the other day about buckles/weight ratings. Are those plastic buckles you used for the legs. I did g hooks, and while I don’t think the leg straps are overly important I think a little more than plastic would be worthwhile. To each his own but want to see all of us DIY guys doing our due diligence to stay safe. I’m sure your load test will be fine, I did one and snatched it with my truck, unknown what the actual break strength was but held up enough to make be confident. Nice work buddy!
Sent from my iPhone using Tapatalk
Sent from my iPhone using Tapatalk
Completely agree. Those were place as a temp to find the best spot placement. They have been replaced with 1 inch cobras
Dude! that looks awesome. good work!
New found respect for the guys that produce these for for the masses. Ill do a few for friends and family, but by my calculations, material, tools and equipment and time...each one SHOULD cost somewhere around $1,943.71! That doesnt include the amsteel.
peteherbst
Well-Known Member
These look really nice! Every time I see someone DIYing anything on here I get a little closer to buying a sewing machine....

Very nice work!
ThanksVery nice work!
They look very nice! Good work. Where did you get the mesh material? I'm interested in getting some.
I can't really tell from the pictures, but some of the connection points look like they could be beefier for safety. I circled 2 such points on the pic below, but like I said I can't tell for sure from the pics. I've done a lot of research and testing and my rule of thumb is to use a 4" overlap and stitch it back and forth lengthwise for 6-8 passes for anything weight bearing. Not knocking your DIY skills, just want you and your family to be safe!!!
#redsquirrelsyearofsafety
DanielB89
Well-Known Member
phenomenal!!! You need to share your plans! haha!
I'm also interested in what all you used on the saddle material wise! That looks great! I need to put my thread injector to work on one of these soon!
I'm also interested in what all you used on the saddle material wise! That looks great! I need to put my thread injector to work on one of these soon!
Much appreciated input drew13. My initial thoughts on those points where that they would not be load bearing, but I decided otherwise on the final version. Those specific points where reworked. See below:They look very nice! Good work. Where did you get the mesh material? I'm interested in getting some.
I can't really tell from the pictures, but some of the connection points look like they could be beefier for safety. I circled 2 such points on the pic below, but like I said I can't tell for sure from the pics. I've done a lot of research and testing and my rule of thumb is to use a 4" overlap and stitch it back and forth lengthwise for 6-8 passes for anything weight bearing. Not knocking your DIY skills, just want you and your family to be safe!!!
#redsquirrelsyearofsafety
View attachment 11297