• The SH Membership has gone live. Only SH Members have access to post in the classifieds. All members can view the classifieds. Starting in 2020 only SH Members will be admitted to the annual hunting contest. Current members will need to follow these steps to upgrade: 1. Click on your username 2. Click on Account upgrades 3. Choose SH Member and purchase.
  • We've been working hard the past few weeks to come up with some big changes to our vendor policies to meet the changing needs of our community. Please see the new vendor rules here: Vendor Access Area Rules

Refinishing a bow

TheBlindCat

Well-Known Member
SH Member
Joined
Apr 9, 2022
Messages
306
I received an old Ben Pearson recurve from a family member, I plan to hunt with it this year instead of the Bear I had planned. The screw holes from the old Browning sight I plan to drill out for brass sight inserts to clean them up. The finish is worn completely off part of the riser, it’s scratched down the limbs but I’m less worried about that. I plan on gently sanding off the old finish, except for the markings (serial #, length/poundage, logo on the lower limb)

I’ve been looking at options for a finish, the oil finishes (Tru Oil, Linseed) don’t interest me. I read mixed reviews on Spar Urethane from a rattle can. I’ve been looking at Thunderbird satin but I don’t own an air compressor or sprayer, and don’t really want to buy one.

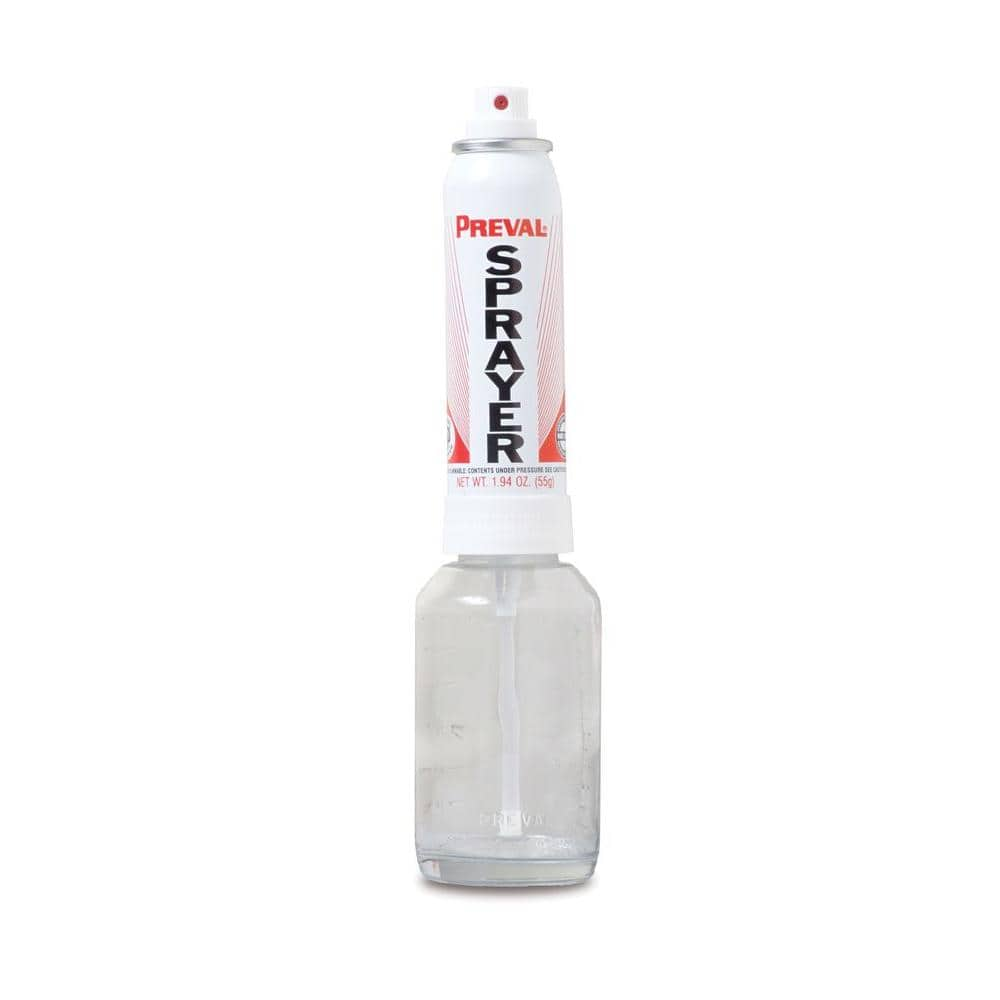
Has anyone used the Preval sprayers and Thunderbird? I saw a couple old Trad Talk forum entries mention that combo. Or should I go buy a 3 gallon Harbor Freight compressor? I think Satin would be a good compromise for a hunting bow or should I get Flat?

Alternatively True North’s arrow sealer says it could be used on bows but doesn’t give an information as to how to apply it.
 
Last edited:
For doing one bow I wouldnt mess with buying a compressor and thunderbird. I would prolly just do a couple three coats of gloss and a top coat of flat with rattle can stuff. There is a water based alternative to thunderbird that I used on a few bows I built and it worked well but requires a compressor and sprayer.
 
I’m fortunate I can spend a bit on a project, I ended up calling and talking to someone at Thunderbird, they were very nice. They said people have had success with Preval or brush applying, but probably the best finish is spraying. So $35 gun and I’ll go buy the cheapest compressor Harbor Freight has to offer.

I started sanding the riser, I’ll post a before/after when I get it done.
 
Easiest and most durable finish I found is the Massey finish 2 parts of 5 minute epoxy and 5 parts of acetone
shake it up in glass jar real good then open lid and wait until bubbles are gone lightly sand your bow and wipe off with lint free rag with rubbing alcohol then let dry and dip your (wear rubber gloves) rag into mixture and then wipe in one direction and let dry 6 hours or until not tacky then lightly steel wool brush off dust and repeat process for at least 4 sessions and let dry and then it’s done. You can throw bow into lake come back year later and finish and bow will be still perfect! Extremely tough finish and flexible and poor man’s version of thunder bird finish and if I feel froggy I mist it with some matte finish spray from can to dull it slightly. Finish will not yellow or peel or crack and did I say cheap
I almost posted that finish as well. It's what I use for my wood arrows. Toughest finish I am aware of. This years arrows started with brand new field tips and I have almost shot them silver into a block target and you cant tell the shaft has ever been shot. I do 6 coats of the massey finish and a top coat of matte from a rattle can.
 
Easiest and most durable finish I found is the Massey finish 2 parts of 5 minute epoxy and 5 parts of acetone
shake it up in glass jar real good then open lid and wait until bubbles are gone lightly sand your bow and wipe off with lint free rag with rubbing alcohol then let dry and dip your (wear rubber gloves) rag into mixture and then wipe in one direction and let dry 6 hours or until not tacky then lightly steel wool brush off dust and repeat process for at least 4 sessions and let dry and then it’s done. You can throw bow into lake come back year later and finish and bow will be still perfect! Extremely tough finish and flexible and poor man’s version of thunder bird finish and if I feel froggy I mist it with some matte finish spray from can to dull it slightly. Finish will not yellow or peel or crack and did I say cheap

I’ve been sanding a lot, it was simple knowing when I got down to bare wood on the riser. For fiberglass limbs how aggressive do I need to go? Just to get the small bubbles and scraps or do I actually need to take it down to bare fiberglass (which worries me a bit). I assume if I do 120/150/220/300/0000 steel wool and it’s smooth an epoxy finish will fill those in. Or does it need to be bare glass? And how do I know it’s don’t to bare glass, will it start sanding black instead of the whitish finish?
 
I would go light on the limbs you don’t want to get to aggressive cause you can change tiller and weight of limbs if you go to aggressive. Get some acetone and wipe on limb then scrape with razor blade You should be able to get majority of old finish that way. Another way is to get a varnish stripper and spray and walk away then scrape or wipe away. I just did that last night on a metal riser71218537364__D8EB4B39-A055-477C-A596-A04969B6E5D1.jpeg
 
Easiest and most durable finish I found is the Massey finish 2 parts of 5 minute epoxy and 5 parts of acetone
shake it up in glass jar real good then open lid and wait until bubbles are gone lightly sand your bow and wipe off with lint free rag with rubbing alcohol then let dry and dip your (wear rubber gloves) rag into mixture and then wipe in one direction and let dry 6 hours or until not tacky then lightly steel wool brush off dust and repeat process for at least 4 sessions and let dry and then it’s done. You can throw bow into lake come back year later and finish and bow will be still perfect! Extremely tough finish and flexible and poor man’s version of thunder bird finish and if I feel froggy I mist it with some matte finish spray from can to dull it slightly. Finish will not yellow or peel or crack and did I say cheap
Is the mixture ratio by volume or weight?
Thanks
 
What ever a full 5 minute epoxy is I think it’s 1.5 or 2 oz then I add the 5 or 6 oz of acetone to it. If you go a little more on acetone it’s ok. The key is to shake the living ****z out of it then open the lid and uncover then wait for the bubbles to go bye bye then dip your clean rag and wipe in one direction then next time your ready to add another coat go the other direction. I shake every time I’m ready to do a coat A pickle or mayo jar of baby food jar is the best and it last a long time I have used mixture a year later if kept in dry cool place
 
8a801f36545e459f0f7ab1416f786a4b.jpg

The jars I use. Jelly jars from the walmarks.

Like @Razorbak66 said, shoot the 2 part epoxy in there, stir it up, add an ounce or two of acetone and mix, fill the jar mostly full and shake the hail out of it. Hands down the best wood arrow finish ever devised. I havent used it on a bow but for sure wouldnt be afraid too. That bow would be impervious to weather.

Sent from my iPhone using Tapatalk
 
Some old school bowyers in the past use to use something very similar I don’t remember the ratio but they would dip it in a large tube 1/2 at a time then let dry and the finish was done. They made it runnier if I remember so it wouldn’t streak
 
Ha, ordered an air compressor that will be here this week since I didn’t like my options locally (used or new). I’ve got it sanded down, just need a good chunk of time to finish it. I did build a little paint booth this weekend out of scrap wood.
 
Not sure if this helps but a kid I knew in high school used a spare tire as an air reservoir for an airbrush. Used it to paint gaming miniatures. It wasn't a hobby I had so I didn't look too far into it. If you're only doing one bow and have a cheap airbrush, and tire inflator, this might limp you through a single project of this size.
 
  • Like
Reactions: JC3
Ha, ordered an air compressor that will be here this week since I didn’t like my options locally (used or new). I’ve got it sanded down, just need a good chunk of time to finish it. I did build a little paint booth this weekend out of scrap wood.

Air compressor, paint gun and Thunderbird. Refinishing this things going to cost you more than a brand new custom recurve. Or are you just doing what I do and undertaking a project so you have an excuse to by the tools you need for it
 
So, just finished the refinish and now the Thunderbird needs a week to cure. On the before pictures you can see the screw holes from an old sight. The finish was worn off the riser and there was scratches and bubbles on the limbs.
954F0733-20D8-4B5E-A77A-D3661FDB26F3.jpeg82798397-57B6-47BD-AA63-A382F28ED2C6.jpeg3623122C-D2CB-4DB2-841B-43E902CD22A2.jpeg5A15C66C-FB59-4974-A1D4-9C1441836F1D.jpeg

I sanded it all off the riser with 150/220/320/400 sand paper. When I went to the limbs I sanded to get through the bubbles, I don’t think I got through any of finish on the limbs, but I didn’t want to risk getting into the fiberglass and weakening the bow. I’ll find out when I shoot it need week.

After light sanding I rubbed I’d down with denatured alcohol and the Ben Pearson logo wiped off. I found Al Harford (Al’s Decals) who was very helpful, sent me a great decal set though he didn’t have the Spoiler and number, I just left what survived of that rather than remove it completely.


292A2C60-6D36-4BE6-8595-DCEF1878BBAD.jpeg

First round of spraying with Thunderbird with their mini HVLP gun on a 3 gallon 2.5 cfm compressor had a lot of orange peel. Sanded it down with 400/600/0000 steel wool. I turned up the pressure, turned down the paint volume and thinned it a bit and it went great. I did two coats 12 hours apart before putting on the decal. Did two or three coats over it. I drilled out the screw holes to place bushings. However I tried to spray into the holes with one last coat which resulted in paint running from moving too slow, too close, trying to go too heavy. Had to sand it back, put one more light coat over that area. Tapped in the bushings with some super glue in the base, more to seal it than anything.

1A458E09-D59C-4DC3-9443-3DB32ADBB25E.jpegF57BAC66-472D-4F2A-8AA8-38050335A787.jpeg9CF9DD2F-B51B-4B5A-8798-C6A39ED0D4B4.jpeg

I twisted up a three bundle B55 string yesterday and tried my hand at making silencers from raw Navajo sheep’s wool I bought from a gentleman on facebook. I hand twisted the wool into a course yarn, we’ll see how that ends up. I need to add a strike plate and rest and serve the string.
 
Back
Top