I promised
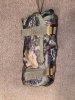
@PapaBear a pouch since he started bouncing ideas off me in October or November. Life has been busy, so haven't had time for a custom project until now. Here's what I came up with based on
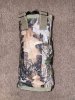
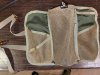
@always89y design. I liked the idea of a hood for the pouch, but I couldn't seem to come up with an implementation I was satisfied with and would stay well out of the way when dropping a rope into the center pocket.
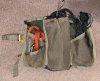
One idea I did play around with was omitting the vertical buckle, and adding a loop of reinforced webbing coming off the lip of the hood, and running the top compression strap through instead. The reinforceed loop of webbing held the loop open to easily snake the G-hook through, and held the hood down.
View attachment 43477